Also: Gallery, Board Layouts
Since the Linistepper is an open source project, users can easily modify the code or hardware to support thier needs. A few have taken the time to share thier favorite mods:
The Linistepper Equatorial Drive: Roman and ceefna^ made an Equatorial Stepper Drive for taking long exposure pictures of the stars.
Hazimin Fauzi^ has translated the Linistepper asm code into SDCC^ C with some variations:
There are two versions:
Max Ries: two modes (3600 and 400 step/rev) w/ on the fly switching and available IO.
The LiniClock project: Roman created a very nice clock with hand moved by a stepper motor. The code to keep track of time fit nicely into the Linisteppers PIC along side the stepper drive code.
OCNC says:
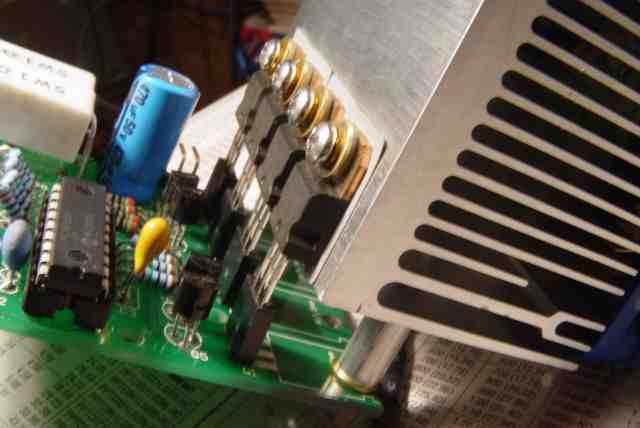
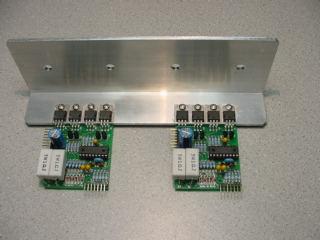
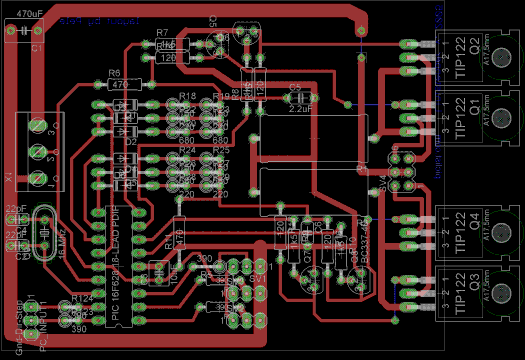
I made a mechanical modification to the Linistepper {ed: version 1, this sort of mount is more or less the default for version 2} by installing 3-position female headers (digikey S7036-ND) where the TIP 122's go. I then took the heatsink from a Masscool CPU Cooling Fan (tigerdirect item #S457-1111) and drilled and tapped four holes into it at 1/2" centers and 9/16" up from the edge. I also drilled and tapped two holes on the fin surface of the heatsink (lies coplanar with the circuit board). These holes line up with the two outer TIP holes and are 19/32" from the heatsink edge (same edge that the TIP holes are referenced from). They also are drilled and tapped to a depth to penetrate two fins. The stand off's were cut from 1/4" aluminum tubing to a finish length of 9/16". The screws used are all #4-40.The ones holding the TIP's down are 3/8" long and the two for the stand off's are 1" long. Following the best mechanical practise I used a lock washer and flat washer under the head of each screw. Belleville washers are recommended for the TIP's but they seem too expensive at $.50 each so I used split ring. I rubbed the backs of the TIP's on a sharp file to get the best contact surface possible. I also filed the mating heatsink surface and then polished it with some steel wool. In place of mica and paste I used Berquist silicone heat pads (digikey BER220-ND). With 1A steppers at 24V I'm unable to detect by touch any heat rise in the TIP's.
I feel that this is a better solution than the bracket that the kit suggests because it eliminates a heat transfer junction and it allows for very easy replacement of the TIP's. Also if you have to drill and prepare a piece of angle for a bracket why not just do the same right on a fan cooled heatsink? The small cost of the additional parts seems insignificant compared to the utility of the final product.
J.R. Hatcher says:
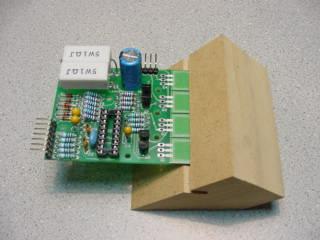
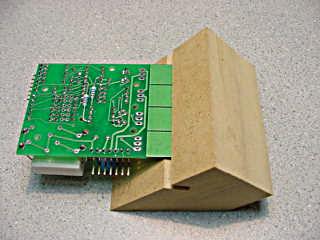
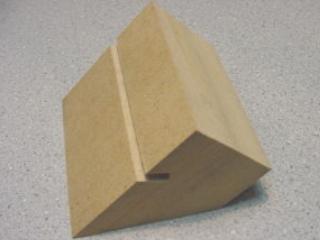
I included a few pictures, one is my invention to hold the board while soldering, it's fast because it's just laying in the groove very loose, yet it holds it flat and off the table.
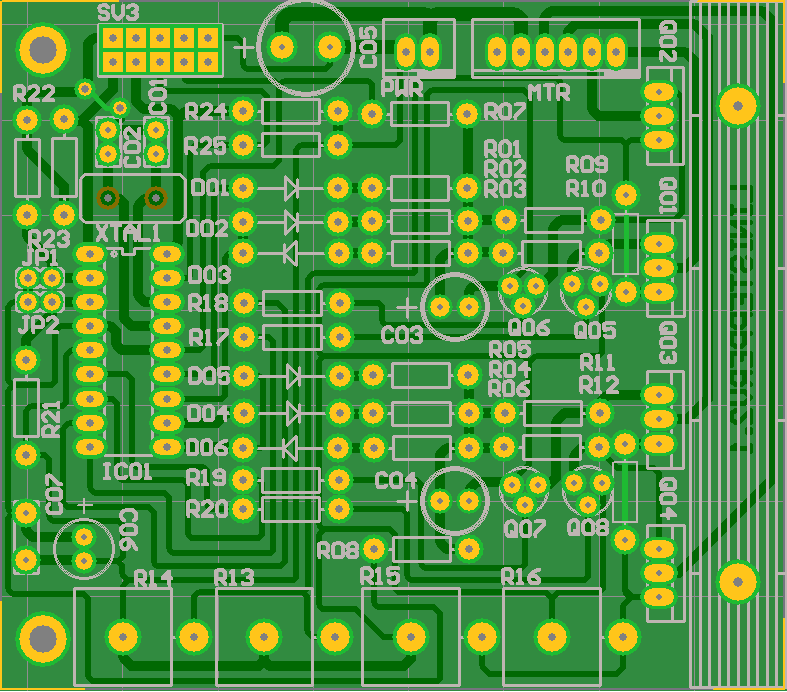
{Ed: Some people like to make thier own linistepper PCBs. The Linistepper is an open source project and we enjoy seeing people take advantage of that when they are able. The people listed here were also kind enough to share thier board files and we've agreed to host them here. If you aren't big on makeing your own PCBs, do keep in mind that we sell the PCB for less than you can pay a board house to make them and the kit of all parts (including the pre-programmed PIC) is less than what you can buy the parts for from any supplier.
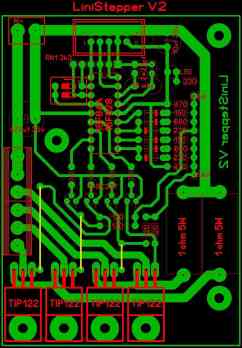
Siniarsa Dewanata posted this very nice layout for the Linstepper version 2.
Murat Sakman posted an alternate layout for the Linistepper Version 2 on the Linistepper facebook group:
LiniStepper-MuratSakman.zip
The only concern we have with that layout is that the transistors should be spread apart so they have more surface area on the heatsink to dissipate all the heat. And perhaps they should be standing up, rather than laying down, to allow direct connection to the heatsink. Other than that, this is a very nice single sided layout, with only a few jumpers. Nice work!Iwan Tejasukmana says: "Apparently the layout by Murat Shakman changed the step and direction pin. I retraced the layout with schematic and found this alteration."
Patricio Oholeguy says:
i just made an interesting improvement to posix version of the Linistepper by aligning the transistors and a few things more.
Linistepper with aligned transistors.zip
Posix says:
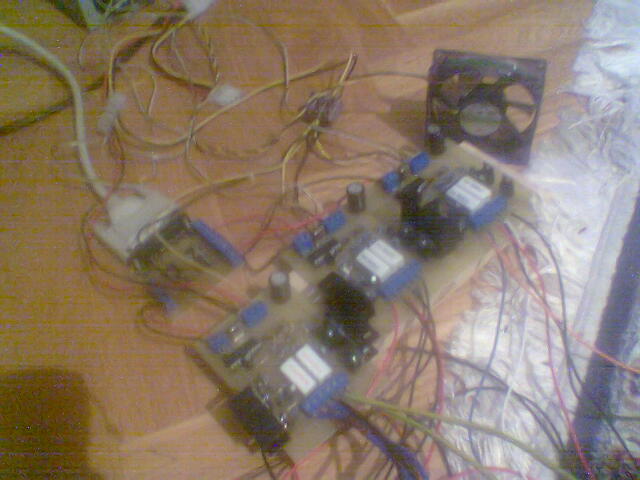
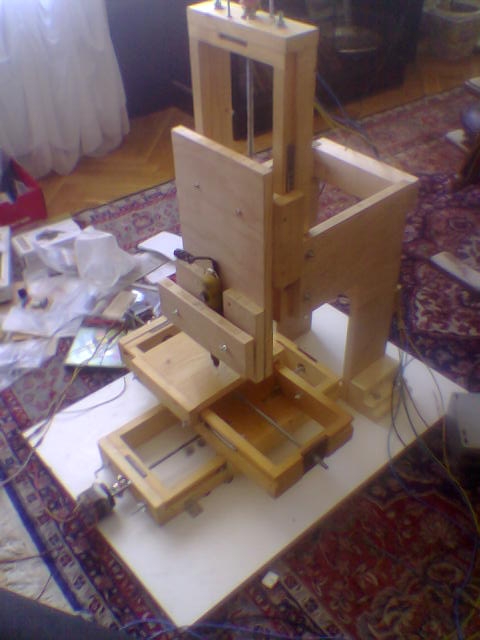
Well folks I have completed my drivers, the knee-mill and I can tell you that linistepper and dremel can dig into a piece of pine like hot knife through butter! I just did some engraving on the back piece of a pcb and it works nice. I even made a mistake of inputting -2mm rather than -0.2mm and it just dug into the pcb and started writing. So I can conclusively say that linistepper with 1.2A step-syn motors works like a charm! I'm using a 12v ATX PSU and an additional $5 12v computer case fan is blowing across the linistepper to provide some fresh air to those alu coolers.
I can tell you that at 200 steps you get your standard driver with all the buzzing and vibrations of any other full step driver. 400 improves somewhat and brings a smile to a newbie.
1200 is where the action begins and a big grin materialises on anyones face who is used to steppers buzzing and jumping and vibrating. If anyone say the gecko video of mariss drawing that spiral will immediately know what I'm talking about.
The linistepper really is good value for money, whether you build it or buy it from piclist.com. The reason I didn't buy mine from james are twofold, first they would've gotten "lost in the post" and second educational value. For someone who burns their fingers on a soldering iron regularly then, by all means, purchase a finished quality item from james at piclist.
Here are Posix's boards hard at work. Notice that the heatsinks are missing! Posix promises to add them when he starts doing prolonged runs. His steppers are small and he is using an underpowered supply so the power drivers are not being stressed to much, but they WILL over heat if he isn't carefull. That CNC machine is Posix's own design and very nicely made.}
Questions:
Just needed to know I'm building an 3 axis router with two steppers on the x axis the question is will I need two driver boards or can I run two steppers from the same board?
Yes, you can run two steppers on the same axis with one board. I see quite a few people use the "two steppers wired in parallel to one driver" technique. I think I first saw it on the Prusa Mendel, but I also see it on the SAE Prusa Mendel, the EMAKER Huxley, etc.
-- David Cary.
| file: /Techref/io/stepper/linistep/mods.htm, 12KB, , updated: 2017/7/19 13:17, local time: 2024/7/15 20:27,
3.146.35.191:LOG IN
|
| ©2024 These pages are served without commercial sponsorship. (No popup ads, etc...).Bandwidth abuse increases hosting cost forcing sponsorship or shutdown. This server aggressively defends against automated copying for any reason including offline viewing, duplication, etc... Please respect this requirement and DO NOT RIP THIS SITE. Questions? <A HREF="http://piclist.com/techref/io/stepper/linistep/mods.htm"> Linistepper, Open Source Stepper Controller Modifications, Stepper motor, </A> |
| Did you find what you needed? |
|
o List host: MIT, Site host massmind.org, Top posters @none found - Page Editors: James Newton, David Cary, and YOU! * Roman Black of Black Robotics donates from sales of Linistep stepper controller kits. * Ashley Roll of Digital Nemesis donates from sales of RCL-1 RS232 to TTL converters. * Monthly Subscribers: Gregg Rew. on-going support is MOST appreciated! * Contributors: Richard Seriani, Sr. |
Welcome to piclist.com! |
.